This post is the third of a six-part series detailing the assembly of a collaborative book between myself and my friend Chelsea, a talented illustrator as well as print and fiber artist (start at Part 1 here)! If you want to make sure you catch all the steps, you can subscribe via email, or RSS feed. (or just keep checking back, I’ll have a new step every other day)
Part 1Â |Â Part 2Â |Â Part 3Â |Â Part 4Â |Â Part 5Â |Part 6
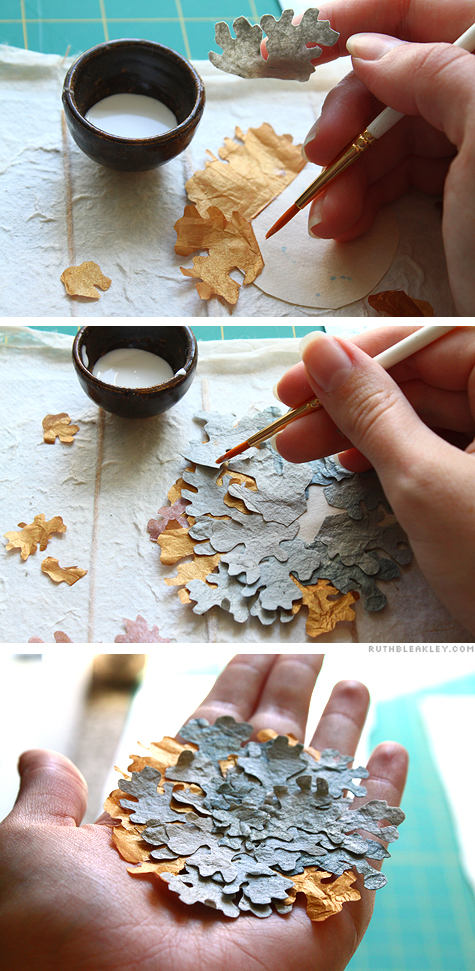
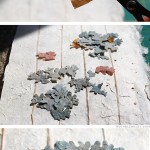
Photo 1:Â I cut out small circles of paper to serve as the base of the lichens, so that I’d be able to position the finished paper lichen wherever I wanted on the book. I started gluing from the outside in, and I left the edges of each little frond unglued so that they would be able to have some dimension.
Photo 2:Â Here I’m about 2/3 of the way done with the lichen – I laid it out without gluing first, so that I’d have an idea of what I wanted it to look like, but I also had a bit of variation. I’m using acid-free PVA glue to glue the paper together.
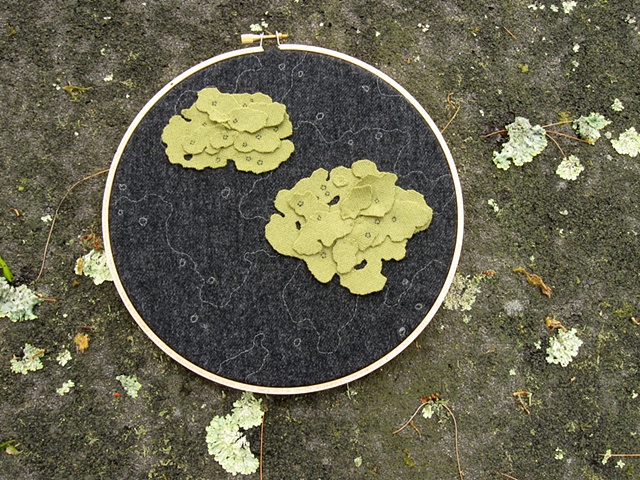
Photo 3: Here’s a finished lichen – I Â liked holding it! It was like a strange mold colored flower, and it was light as a feather. I made three large lichens, (about 3″ in diameter) two small lichens (about 2″ in diameter) and a bunch of tiny lichen bits. I was inspired by Chelsea’s layering technique that she uses on her lichen wall art, which you can see below:


4 Comments
[…] between myself and my friend Chelsea, a talented illustrator as well as print and fiber artist (start at Part 1 here)! If you want to make sure you catch all the steps, you can subscribe via email, or RSS feed. (or […]
[…] Part 5 of A Collaborative Artist’s Book With My Friend Chelsea Clarke Part 3 of A Collaborative Artist’s Book With My Friend Chelsea Clarke […]
[…] 1Â |Â Part 2Â |Â Part 3Â |Â Part 4Â |Â Part 5Â |Part […]
[…] 1Â |Â Part 2Â |Â Part 3Â |Â Part 4Â |Â Part 5Â |Part […]