This post is the fifth of a six-part series detailing the assembly of a collaborative book between myself and my friend Chelsea, a talented illustrator as well as print and fiber artist (start at Part 1 here)! If you want to make sure you catch all the steps, you can subscribe via email, or RSS feed. (or just keep checking back, I’ll have a new step every other day)
Part 1Â |Â Part 2Â |Â Part 3Â |Â Part 4Â |Â Part 5Â |Part 6
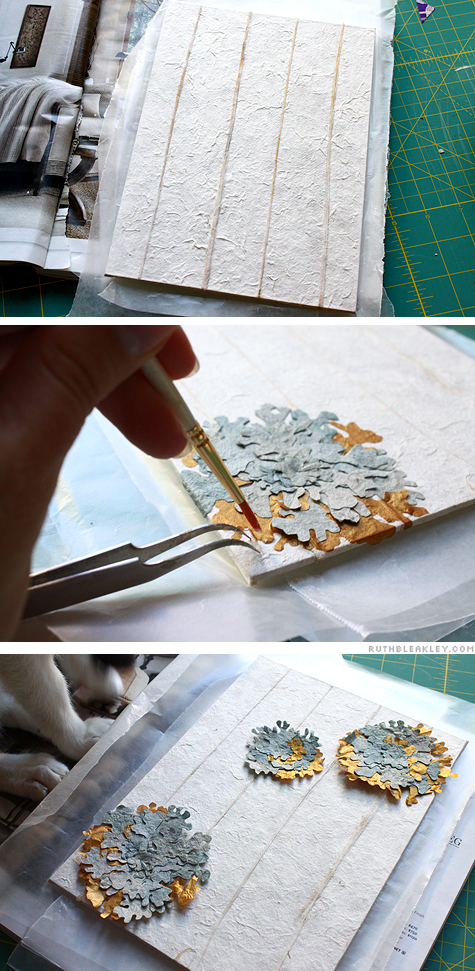
Photo 1:Â Here’s the cover after I put it under the press, wrapped in waxed paper, for a few hours. The vertical lines are part of the paper and are thin pieces of grass or reed, incorporated as the paper was made. I thought it provided a nice contrast to the crazy organic shapes of the lichen.
Photo 2:Â First I applied glue to the back of the lichen, and then carefully set it down where I wanted. I used tweezers and additional glue on a small brush to adhered lichen fronds that weren’t stuck down properly, or to reposition the bronze tissue paper which was easily wrinkled and folded because it was so thin.
Photo 3:Â Slightly out of order photo – Â here are the lichens the way I laid them out before I glued them – I played around with a few different arrangements until I settled on the one I liked best. You can also spot Meowstro here keeping a close eye on things.
Part 1Â |Â Part 2Â |Â Part 3Â |Â Part 4Â |Â Part 5Â |Part 6


5 Comments
What an interesting project. I just read all the parts…what fun! I finally made something with my little triangles you sent me:) fun,fun,,,,have a nice rest of your Sunday.
Thanks Cynthia! Glad to hear you made something fun with the little triangles!
[…] 1 | Part 2 | Part 3 | Part 4 | Part 5 November 12th, 2012 | Tags: accordion book, bookbinding, collaboration, lichen | Category: […]
[…] back, I’ll have a new step every other day) Part 1Â | Part 2 |Â Part 3Â |Â Part 4Â |Â Part 5Â |Part […]
[…] 1Â |Â Part 2Â |Â Part 3Â |Â Part 4Â |Â Part 5Â |Part […]