This post is the fourth of a six-part series detailing the assembly of a collaborative book between myself and my friend Chelsea, a talented illustrator as well as print and fiber artist (start at Part 1 here)! If you want to make sure you catch all the steps, you can subscribe via email, or RSS feed. (or just keep checking back, I’ll have a new step every other day)
Part 1Â |Â Part 2Â |Â Part 3Â |Â Part 4Â |Â Part 5Â |Part 6
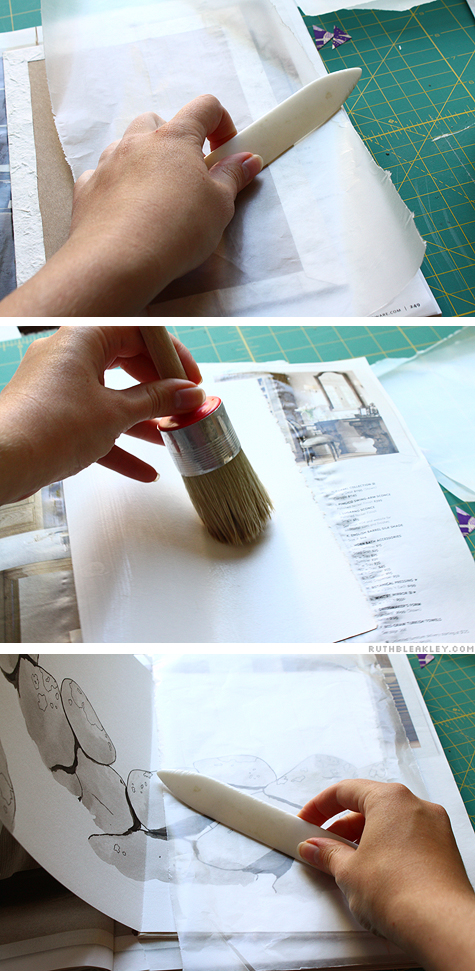
Photo 1:Â I cut the handmade paper I used for the cover to size, allowing 3/4″ overlap around the sides of the cover board. I wanted to use a highly textured paper to mimic the pebbly surface of a boulder. This one was handmade in Thailand. I used a combination of wheat starch paste and PVA to glue it on, and here I am burnishing it with a bone folder.
Photo 2:Â Applying my glue, a mixture of wheat starch paste and PVA to one side of the accordion to be glued to to the cover. I got this giant paste brush which makes gluing covers a lot easier.
Photo 3:Â Burnishing the page onto the cover with a bone folder. I use waxed paper between the paper and the folder to prevent marks from the bone folder and to prevent any ink smearing that might happen from the glue-dampened paper. I leave the waxed paper in as I press the book, so it won’t stick to itself.


1 Comment
[…] just keep checking back, I’ll have a new step every other day) Part 1Â | Part 2 |Â Part 3Â |Â Part 4Â |Â Part 5Â |Part […]