Hey bibliophiles! You might be surprised (or at least I was) to find that one of my most popular blog pages is my Octopus Drawing Sequence post from Feb 10, 2010, where I featured a step-by-step octopus drawing I did for a specially commissioned miniature book.
Well I made that post before I knew the wonders of photoshop, so for your surprise and delight, I’m reposting my “draw an octopus” step by step, but this time with larger photos that are more pinnable on Pinterest.
The technical explanation of how I drew/painted the octopus appears below the photo, along with links to buy the same materials I used – click here to jump to it!
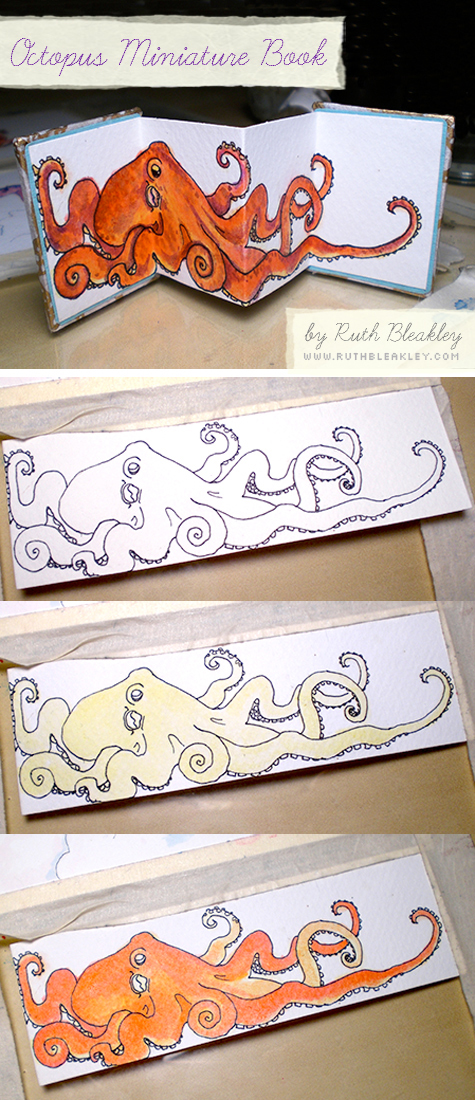
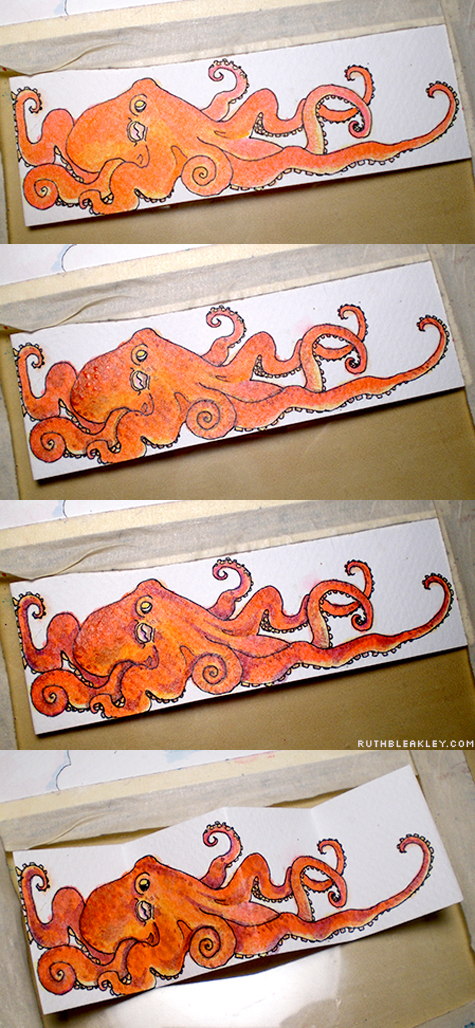
Ok! So I hesitate to call this a “tutorial” because it doesn’t show the most basic part, DRAWING the octopus – it should really be called “paint an octopus” but oh well! What I really wanted to show was the layering technique when using drawing ink (I used these Windsor Newton drawing inks).
When you look at the finished drawing/painting you might be a little mystified at how I did it, but! all you need to do is layer colors, allowing them to dry most of the way in between each layer.
Why drawing ink and not watercolor? Well I like the transparency and really bright color that ink offers. I’ve heard that watercolor that comes in tubes is also much more vivid but I haven’t gotten a chance to try it (maybe someone could share their experience in the comments?) Drawing ink also usually has shellac in it, or something like that, that gives it a little bit of shine when it dries which I also like.
The colors I used were canary yellow, orange, red, brown and a dash of violet and I used a soft round watercolor brush. I started with the lightest colors first, and darkest colors last. The actual drawing I did first with a mechanical pencil, then I traced over it with a micron pen (my favorite for detailed drawing), allowed the ink to dry completely (overnight is best) and then erased the pencil lines with a kneadable eraser (the best kind of eraser EVER).
I used Canson mi tientes because that’s what I had on hand. Taping down your paper makes it easier to paint on it without it getting away from you or buckling because of the moisture – you can see I just used a piece of plexi glass and some low-tack artist’s masking tape . You could also use blue tape, but regular masking tape is too sticky and will tear your paper when you peel it off.
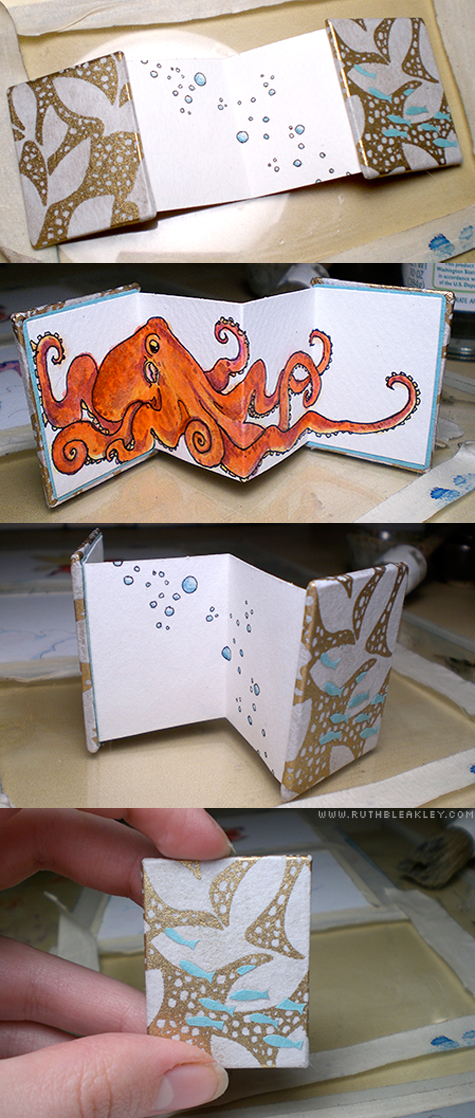
Once you have your drawing, use my mini accordion book photo tutorial to make a little book and you’ll have a lovely little tiny gift!
this post contains affiliate links



1 Comment
[…] Octopus Drawing Sequence […]